For your basement drywall project, you’ll need moisture-resistant materials like purple board or greenboard to prevent mold growth. Install a proper vapor barrier and use fiberglass-backed joint tape with moisture-resistant compound for seams. Choose coarse-thread drywall screws (1-1/2″ to 1-5/8″) and appropriate anchors for mounting. Don’t forget crucial insulation with R-values between R11 and R30. Mastering these material choices is just the initial step toward creating a professional-grade basement finish.
Key Takeaways
- Use moisture-resistant purple XP drywall panels with fiberglass backing to prevent mold growth and ensure long-term durability.
- Install a polyethylene vapor barrier between insulation and drywall to control moisture transfer through basement walls.
- Select fiberglass tape with adhesive backing and moisture-resistant joint compound for stronger, mold-resistant seams.
- Choose coarse-thread drywall screws of 1-1/2″ length and proper drywall anchors for secure installation.
- Apply insulation with appropriate R-value (R11-R30) behind drywall, based on your climate zone requirements.
Essential Moisture-Resistant Drywall Options
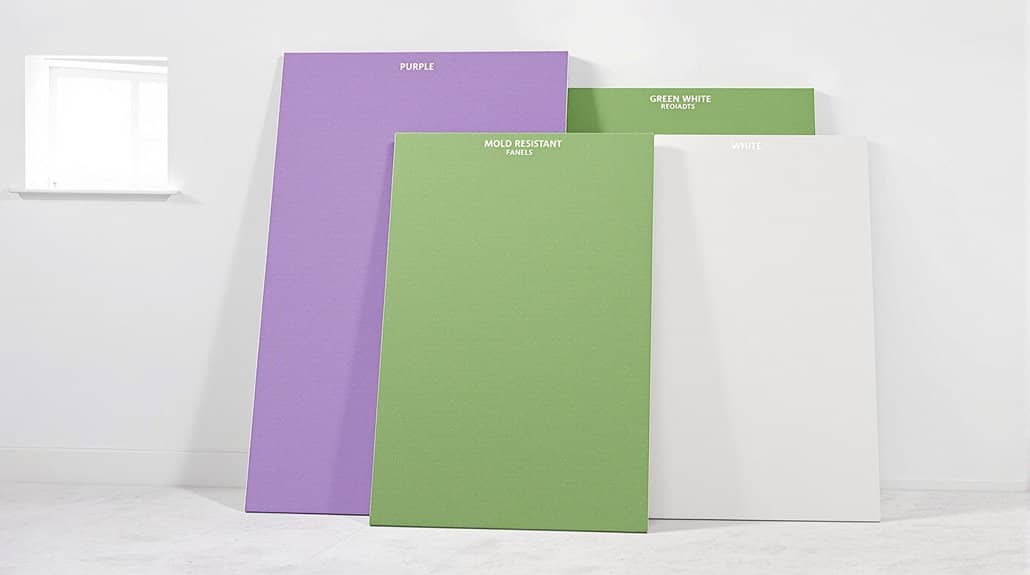
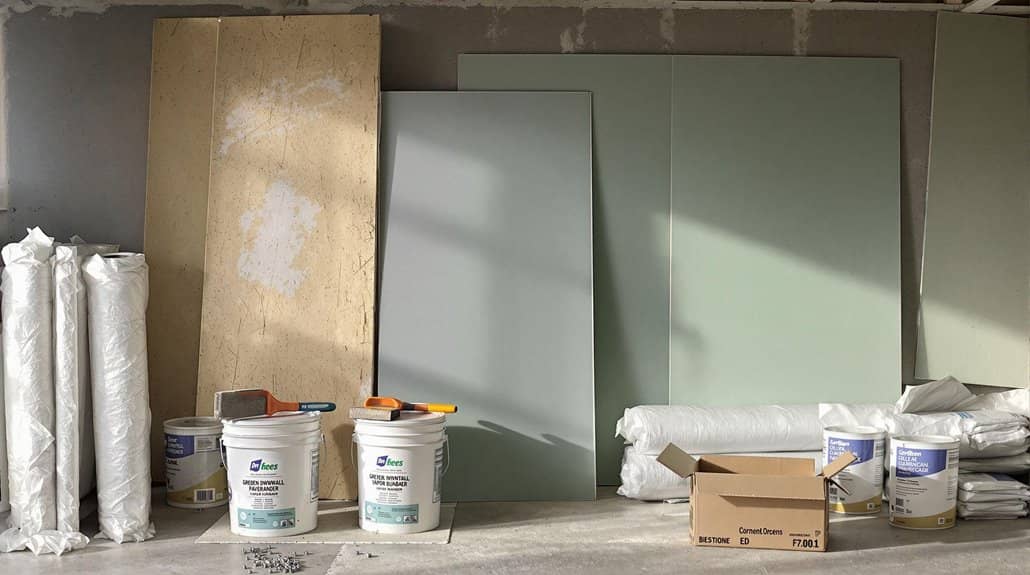
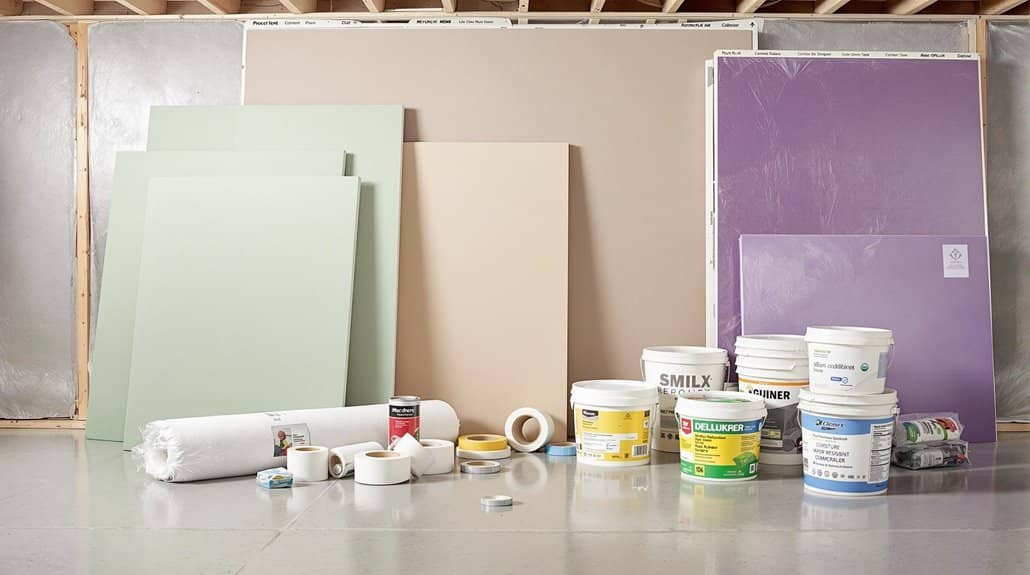
When installing drywall in your basement, selecting moisture-resistant materials is critical for long-term durability and mold prevention. You’ll want to focus on two primary options: greenboard and purple board. Greenboard features a water-repellent core and specialized paper covering, making it ideal for high-humidity basement environments. Purple board takes protection a step further by incorporating fiberglass backing instead of paper, offering superior mold resistance. Cement board options provide the highest level of moisture protection for extreme conditions. For your basement renovation, you’ll need to pair these moisture-resistant drywall options with proper installation techniques. Install a vapor barrier before mounting the drywall, and seal all joints with mold-resistant joint tape and compound. Keep in mind that building codes may require specific moisture-resistant materials in certain areas, particularly near plumbing fixtures or utility spaces. Following these specifications guarantees your basement meets safety standards while providing lasting protection.
Selecting the Right Joint Compounds and Tapes
Choosing appropriate joint compounds and tapes represents a significant step in achieving professional-quality basement drywall installation. You’ll want to select a moisture-resistant joint compound specifically formulated for below-grade applications to prevent potential mold issues in your basement space.
When taping drywall seams, opt for fiberglass tape with adhesive backing, as it creates stronger joints than traditional paper alternatives. Apply your joint compound in multiple thin layers, allowing each coat to dry completely before progressing to the next. This method guarantees you’ll achieve the smooth finish you’re looking for.
Before painting, don’t skip the important step of applying primer to your finished surfaces. It’s critical for proper paint adhesion and helps fill any remaining pores in the joint compound, giving you the professional results you deserve.
Critical Hardware and Fastening Systems
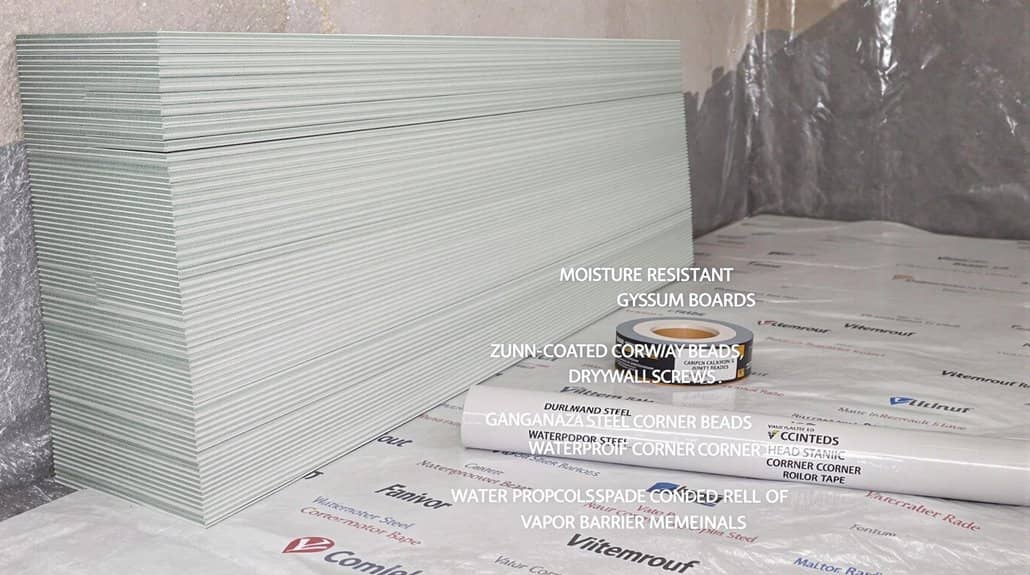
The success of your basement drywall project largely depends on selecting the right fastening hardware and support systems. When installing drywall, you’ll need coarse-thread drywall screws of 1-1/2″ or 1-5/8″ length for proper stud attachment. Given higher moisture levels in basements, opt for fiberglass joint tape over paper varieties for improved durability.
| Hardware Type | Best Use | Key Feature |
|---|---|---|
| Drywall Screws | Stud Attachment | Prevents nail pops |
| Fiberglass Tape | Joint Coverage | Moisture resistant |
| Drywall Anchors | Heavy Item Support | Weight distribution |
| Corner Beads | Edge Protection | Smooth transitions |
| Coarse Threads | Wood Studs | Strong grip |
For areas between studs where you’ll mount heavy items, install drywall anchors to guarantee proper weight distribution. Don’t forget corner beads for professional-looking outside corners that’ll withstand daily wear and cleaning. Using mold-resistant purple XP drywall panels provides additional protection against basement humidity and moisture concerns.
Insulation and Vapor Barrier Materials
Beyond securing drywall to your basement walls, proper insulation and vapor barrier materials create a moisture-resistant thermal envelope. You’ll want to select insulation with an R-value between R11 and R30, depending on your climate and how you’ll use your basement space.
For ideal moisture control, install fiberglass batts or rigid foam insulation boards against your basement walls. You’ll need to add a polyethylene vapor barrier on the warm side of the insulation before mounting your drywall materials. Remember to maintain a critical 1/2 inch gap between the drywall’s bottom edge and floor to prevent moisture wicking. Before starting your project, check your local building codes, as they’ll specify required insulation thickness and vapor barrier installation methods for your area.
Surface Preparation Tools and Supplies
Before undertaking any drywall installation, you’ll need an extensive set of surface preparation tools to guarantee precise measurements and safe handling of materials. Your fundamental toolkit should include a tape measure and T-square for accuracy, along with a utility knife for clean drywall cuts.
Don’t overlook safety equipment – dust masks and safety goggles are vital to protect you from airborne particles during the preparation process. You’ll also want to invest in a drywall lift, which makes ceiling panel installation safer and more manageable. To maintain ideal moisture levels in your basement, incorporate a dehumidifier into your setup. Keep cleaning supplies like brooms and vacuum cleaners ready to manage dust and debris throughout the project. These tools will help you achieve professional results while maintaining a safe, organized workspace. For enhanced comfort between rooms, consider adding soundproof drywall options that effectively minimize noise transfer throughout your home.
Finishing Materials for Professional Results
When working with basement drywall, selecting proper finishing materials becomes vital for achieving professional-grade results. You’ll want to start with mold-resistant drywall, such as greenboard or purple board, which provides superior protection against basement humidity. Use fiberglass joint tape, specifically products like FibaTape Mold X, to reinforce seams and prevent future mold issues.
For a flawless finish, apply two coats of quality joint compound, ensuring each layer dries completely before sanding. Don’t skip the drywall-specific primer, as it’s important for proper paint adhesion. Complete your project by installing corner beads and trim for crisp, clean lines. These finishing materials work together to create a basement that not only looks professional but also stands up to moisture challenges that typically affect below-grade spaces. Professional installation of these materials can range from basic drywall costs of $500 to $1,500 for a medium-sized basement room.
Safety Equipment and Dust Control
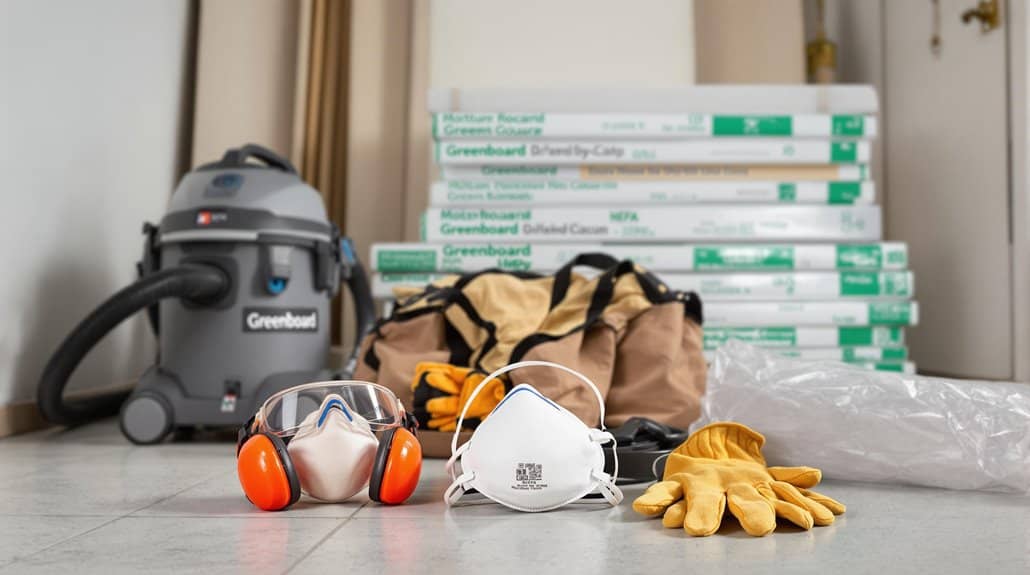
Since drywall work generates significant amounts of fine particles, proper safety equipment and dust control measures are non-negotiable for basement installations. You’ll need to wear safety goggles to shield your eyes from airborne debris and a dust mask or respirator to protect your lungs during cutting and sanding operations.
To maintain a clean workspace throughout your drywall installation, seal off the area with plastic sheeting to contain dust and prevent it from migrating to other parts of your home. Guarantee proper ventilation by opening windows or using fans to improve air circulation. Regular cleaning with a HEPA-filtered vacuum will help manage dust levels effectively. These measures aren’t just about comfort – they’re crucial practices that experienced installers follow to maintain a safe, controlled environment while achieving professional results.
Frequently Asked Questions
What Type of Drywall Is Best for Basement?
You’ll want moisture-resistant greenboard or purple board for most areas, with fire-rated Type-X in utility spaces. Consider 5/8″ thick panels for soundproofing. Install with mold-resistant tape and compounds for ideal protection.
What Is the Best Material to Use for Basement Walls?
You’ll need waterproof insulation and moisture-resistant drywall (greenboard) for your basement walls, topped with moisture-resistant paint. Consider basement wall systems that integrate thermal barriers and soundproofing options for ideal finishing techniques.
What Is the Best Material to Finish a Basement?
You’ll want to use moisture-resistant drywall with proper insulation and vapor barriers. Consider greenboard or purple board, paired with R11 fiberglass insulation. Don’t forget waterproof framing materials to guarantee lasting basement protection.
Should I Use Drywall or Greenboard in My Basement?
You’ll want to choose greenboard for your basement due to its superior moisture resistance and mold prevention. While it costs more than standard drywall, its protection against dampness makes it worth the investment for below-grade installations.
Conclusion
Select your basement drywall materials strategically to protect against moisture while ensuring long-term durability. You’ll need moisture-resistant drywall panels, mold-resistant joint compounds, and appropriate vapor barriers as your foundation. Don’t compromise on fasteners or taping materials – they’re essential for structural integrity. When you’ve gathered all specified materials, including proper safety equipment, you’re ready to create a professional-grade finished space that’ll withstand basement conditions.