You’ll need several crucial tools for your basement drywall installation project. Start with measurement basics like a 25-foot tape measure, framing square, and level. Include cutting tools such as a utility knife, T-square, and circular saw. Don’t forget fastening equipment like a screw gun and proper-length screws. Add surface prep gear including 6-inch and 12-inch drywall knives, plus safety equipment like goggles and dust masks. Proper tool selection helps guarantee professional-quality results throughout each phase of your project.
Key Takeaways
- A 25-foot tape measure and level are crucial for accurate measurements and ensuring proper alignment of basement walls.
- Utility knife and T-square provide precise cutting capability for fitting drywall panels around pipes and obstacles.
- Screw gun with depth adjustment prevents over-driving screws through drywall while securing panels to basement framing.
- Dust mask and safety goggles protect against harmful drywall dust common in confined basement spaces.
- 6-inch and 12-inch drywall knives enable proper joint compound application for smooth seams between panels.
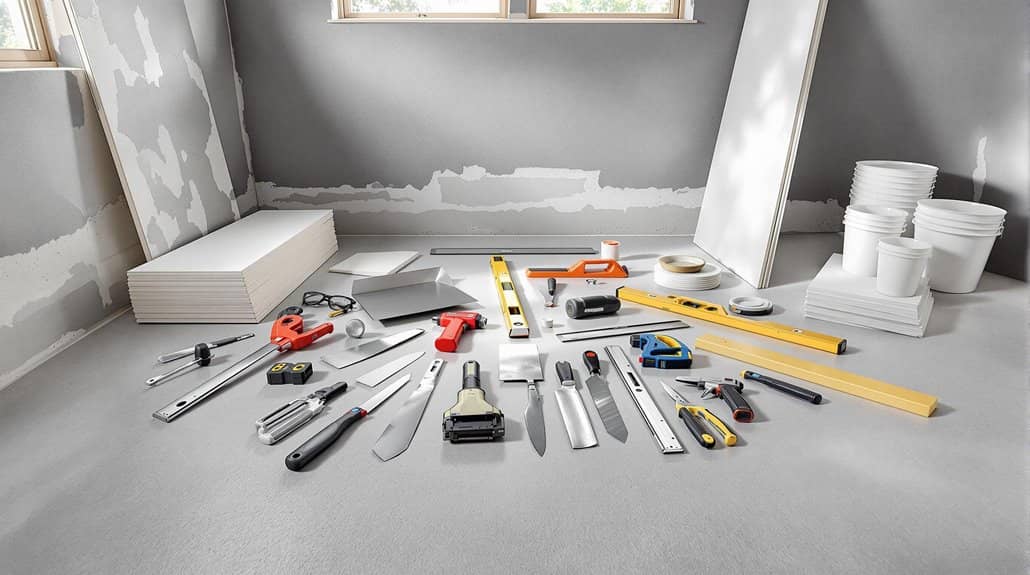
Basic Measurement and Layout Tools

When installing drywall in your basement, having the right measurement and layout tools will make the difference between professional-looking results and amateur mistakes. Your drywall installation process requires a precise set of tools that help guarantee accuracy at every step.
Start with a 25-foot tape measure for accurate wall and ceiling measurements. You’ll need a framing square to verify right angles and check that your studs are properly aligned. A chalk line is vital for marking long, straight reference lines across surfaces, making drywall positioning easier. Include a level, ideally 2 to 6 feet in length, to confirm your framing is straight and even. Don’t forget a plumb bob for checking vertical alignment, particularly significant when you’re working around doors and windows. These drywall tools are fundamental to making precise improvements in your home improvement project. A quality stud finder is essential for marking stud locations before attaching the drywall sheets to ensure secure installation.
Cutting and Shaping Equipment
Mastering drywall installation requires a specialized set of cutting and shaping tools that work together for precise results. You’ll need a utility knife with interchangeable blades paired with a 48-inch drywall T-square for making long straight cuts on your drywall sheets. When you’re working in tight spaces or creating openings for electrical boxes, you’ll rely on a jab saw, which features a sharp tip and coarse teeth for detailed work.
For larger projects where efficiency matters, your circular saw will become invaluable for quick, accurate cuts. Don’t forget the miter saw – it’s crucial for those angled cuts in trim and molding that give your installation a professional finish. These cutting and shaping tools guarantee you’ll achieve clean, precise results while installing drywall in your basement.
Professional Fastening Tools

To achieve professional-grade drywall installation, you’ll need reliable fastening tools that deliver consistent results. When you’re ready to install drywall in your basement or home theater, choose coarse-thread screws that are 1 1/4 inches long for 1/2-inch panels. Your screw gun’s depth adjustment feature guarantees proper countersinking for a smooth finish.
Using moisture resistant drywall in Calgary basements helps prevent costly water damage and mold growth over time.
For successful drywall projects, remember these crucial fastening tools and techniques:
- Use a dedicated screw gun with auto-loading capability to maintain consistent spacing at 12-16 inches
- Select a pneumatic nail gun for rapid framing work, greatly reducing physical strain
- Invest in professional-grade fastening tools with adjustable depth settings to prevent screw popping and guarantee seamless taping
These tools will help you achieve the clean, professional results you’re looking for in your basement renovation.
Surface Preparation and Finishing Gear
Since proper surface preparation directly impacts the final appearance of your drywall installation, you’ll need specific finishing tools to achieve professional results. Start with reliable surface cleaning supplies to remove dust and debris from your basement walls, ensuring ideal adherence. A thorough inspection of the area for signs of mildew will help determine if specialized moisture-resistant materials are needed. Your crucial toolkit should include both 6-inch and 12-inch drywall knives for joint compound application, with the smaller knife for seam coverage and the larger one for feathering edges. You’ll also need drywall sanding sponges, fiberglass mesh, and sanding sheets in varying grits. Consider investing in a texture sprayer to create decorative finishes and mask minor imperfections. During final inspection, use bright lighting to spot any missed areas or uneven surfaces before moving on to primer and paint.
Safety and Protective Equipment
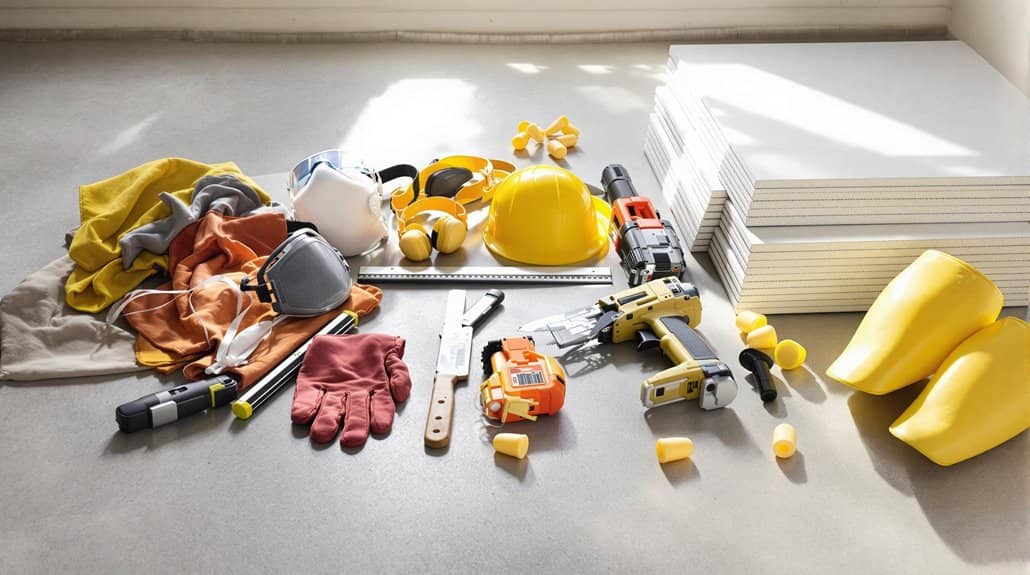
Proper safety equipment serves as your initial line of defense when tackling basement drywall installation projects. You’ll need safety goggles to protect your eyes from debris, and dust masks to prevent inhaling harmful drywall dust. Don’t forget hearing protection when operating power tools, and heavy-duty work gloves to shield your hands from sharp edges. For extended periods of kneeling, knee pads provide crucial comfort and protection. Our experienced technicians agree that maintaining proper safety equipment is essential for both residential and commercial drywall projects.
- Prioritize respiratory protection by wearing a dust mask rated for fine particles, as basement spaces often have limited ventilation
- Combine safety goggles with hearing protection for thorough head-area coverage during cutting and drilling tasks
- Keep multiple pairs of work gloves handy, as they can become coated with joint compound or damaged during intense work sessions
Power Tools for Efficient Installation
While manual tools have their place in drywall installation, power tools dramatically increase efficiency and precision when finishing your basement. You’ll want to start with a cordless drill, ideally 12V to 18V, for driving screws into studs. For even faster progress, upgrade to a drywall screw gun that automatically sets screws at the perfect depth every time. When it comes to making cuts, electric multi-tools excel at creating precise openings for outlets and fixtures. Don’t overlook the importance of a drywall lift, especially if you’re working solo on ceiling installations. For the final touches during taping and mudding, a quality sander with mesh sheets will help you achieve that professional finish. These power tools might require some hands-on experience, but they’ll transform your basement project from intimidating to doable. Our team’s perfectionist approach ensures every power tool is utilized properly to deliver seamless results that meet the highest standards.
Material Handling and Support Systems
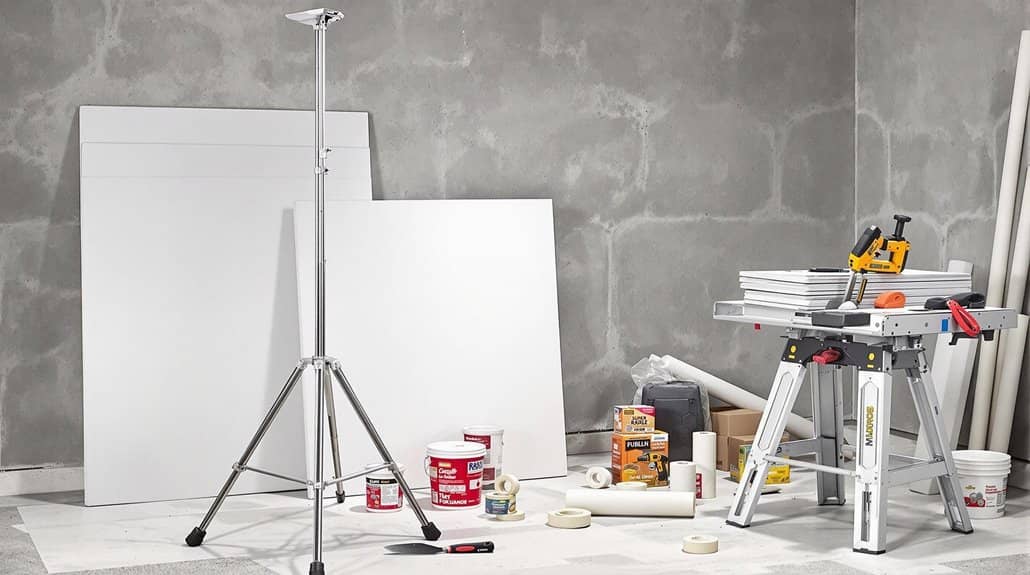
Having the right tools is only part of the equation – you’ll need reliable material handling systems to complete your basement drywall project safely and effectively. A quality drywall lift proves indispensable for ceiling installations, while proper support braces guarantee stability during the mounting process. You’ll also want to establish a dedicated work surface using sawhorses for precise cutting.
Here’s what you’ll need for ideal material handling:
- A professional-grade drywall lift with adjustable height settings and secure locking mechanisms
- Heavy-duty support braces that can be quickly positioned and adjusted while maintaining sheet alignment
- A sturdy cutting station with proper material storage space nearby to keep your sheets flat and protected
Remember to implement proper handling techniques, keeping sheets close to your body and using your legs to lift, guaranteeing both safety and efficiency throughout your installation.
Customer satisfaction drives every aspect of proper drywall installation, from equipment selection to final finishing touches.
Frequently Asked Questions
What Tools Are Needed for Drywall Installation?
You’ll need a drywall knife for cutting, T-square tool and measuring tape for precision, safety goggles for protection, drywall lift for ceilings, and don’t forget screws, joint compound, and sanding block for finishing.
What Supplies Do You Need to Put up Drywall?
You’ll need drywall sheets in your chosen type (standard or moisture-resistant), screws, joint compound, tape, T-square, utility knife, and finishing tools. Consider framing requirements and soundproofing options for best installation results.
How Do You Install Drywall in a Basement for Beginners?
Start with moisture barriers and proper framing, then cut drywall sheets to size. Install ceiling initially, then walls. Use screws every 16 inches, tape seams, and apply joint compound in thin layers.
What Tools Do I Need for Drywall Mudding?
You’ll need drywall knives in different sizes, mixing tools for joint compound, sanding blocks, a utility knife, and safety gear like a dust mask. Don’t forget a mud pan and taping tools for professional-quality finishing.
Conclusion
You’ll need to invest in quality tools to complete your basement drywall project successfully. From precise measuring instruments to efficient power tools and proper safety equipment, each item serves a critical purpose in the installation process. Verify you’ve acquired all crucial components before starting, as having the right tools readily available will streamline your workflow and result in professional-grade drywall installation.