To safely remove your Calgary home’s popcorn ceiling, you’ll need to initially test for asbestos, especially in pre-1980 structures. You’ll require specific tools including a garden sprayer, wide putty knife, and proper safety equipment like respirators and protective clothing. The removal process involves thorough room preparation, wet scraping techniques, and careful post-removal finishing. With costs ranging from $1-$3 per square foot, proper planning and execution are essential for successful transformation of your dated ceiling texture.
Key Takeaways
- Homes built before 1980 in Calgary require professional asbestos testing before any popcorn ceiling removal attempts.
- Professional removal costs range from $1-$3 per square foot, with projects typically taking 1-2 weeks to complete.
- Complete room preparation includes covering floors, removing furniture, and sealing doorways with plastic sheeting to contain dust.
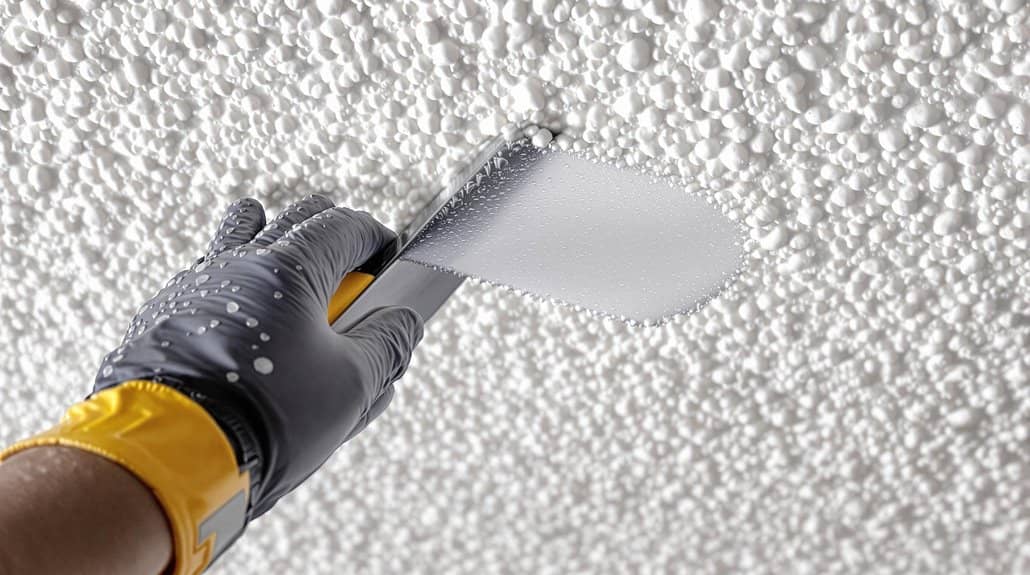
- Use a garden sprayer to dampen small sections at a time, making the popcorn texture easier to scrape off.
- After removal, inspect for damage, apply joint compound to imperfections, and prime the ceiling before painting.
Understanding Popcorn Ceilings and Their History in Calgary Homes
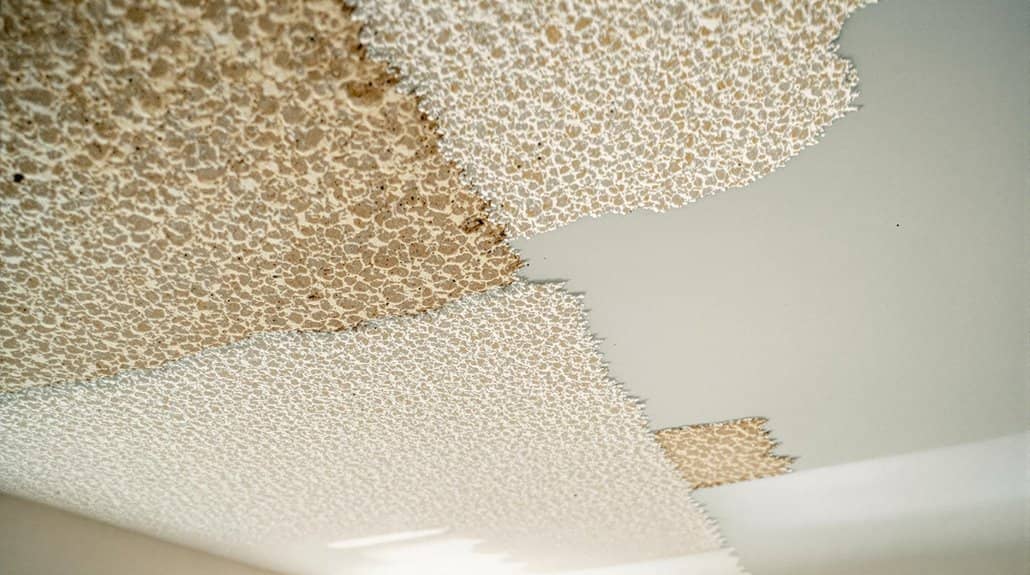
While popcorn ceilings once dominated Calgary’s residential architecture from the 1950s through the 1980s, these textured surfaces now represent an outdated design element that many homeowners want to eliminate.
You’ll find these acoustic ceilings in countless Calgary homes, where they were initially prized for their ability to mask imperfections and dampen sound. The texture consists of a specialized mixture of drywall mud combined with polystyrene or vermiculite. However, a significant health concern emerged in the late 1970s when asbestos, a common component in these ceilings, was identified as hazardous. If your home was built before 1980, testing for asbestos is essential before proceeding with removal, as concentrations can range from 1% to 20%. Today’s modernization trends favor smooth, contemporary ceiling finishes over the dated popcorn texture. Professional removal services ensure proper handling of hazardous materials while maintaining strict safety standards throughout the removal process.
Safety Considerations and Asbestos Testing Requirements
Before undertaking any popcorn ceiling removal project in Calgary, professional asbestos testing must be your initial priority, particularly for homes built before 1980. You’ll need to obtain a test kit from local health departments or certified contractors, as your ceiling may contain up to 20% asbestos fibers. If detected, don’t attempt DIY removal – hire a licensed professional to avoid serious health risks from airborne asbestos particles.
| Safety Protocols | Protective Gear | Ventilation Requirements |
|---|---|---|
| Asbestos testing | Dust mask | Open windows |
| Professional inspection | Safety goggles | Running fans |
| Area containment | Long sleeves | Cross ventilation |
During the removal process, proper safety attire is non-negotiable. You’ll need a dust mask, goggles, and protective clothing. Guarantee adequate ventilation by opening windows and using fans to maintain air quality throughout the project.
Essential Tools and Materials for Ceiling Removal
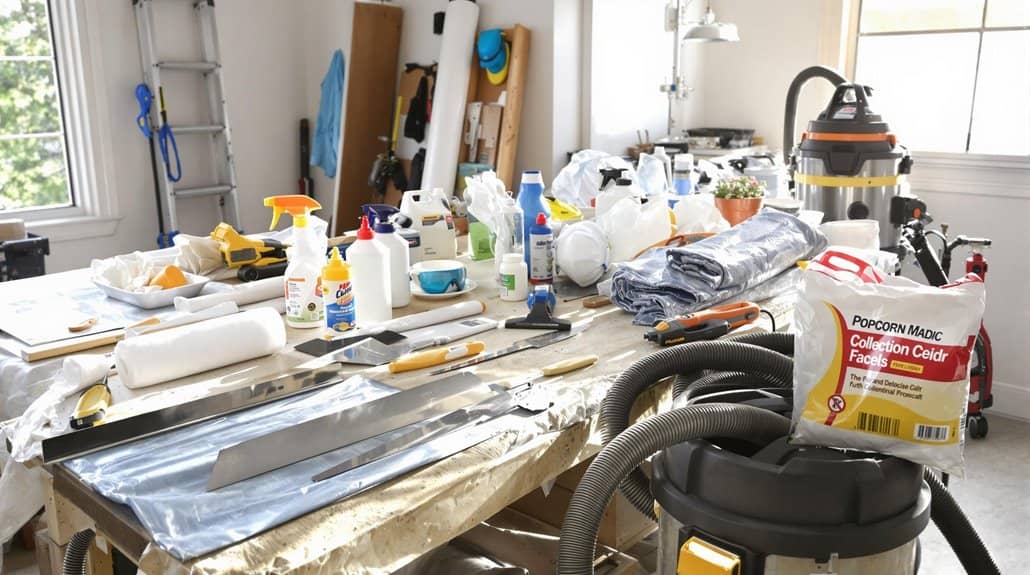
Three core categories of supplies are vital for a successful popcorn ceiling removal project: preparation materials, removal tools, and safety equipment. You’ll need to gather all important tools before starting this DIY project, ensuring a smooth and efficient process.
- Begin with preparation items: waterproof drop cloths, plastic sheeting, and an asbestos test kit
- Secure your removal tools: garden sprayer for water application and a wide putty knife for scraping
- Don’t skip protective gear: respirator, safety goggles, and long-sleeved clothing
- Stock finishing materials: joint compound, sandpaper, and primer
When removing popcorn ceilings, proper tool selection makes the difference between a challenging task and a manageable project. Remember to choose professional-grade equipment for best results, as quality tools will greatly impact your work’s efficiency and final appearance.
Room Preparation and Surface Protection Steps
Since proper preparation greatly impacts the success of popcorn ceiling removal, you’ll need to systematically protect your space before beginning the scraping process. Start your room preparation by removing all furniture and disconnecting electrical fixtures at the circuit breaker for safety. Cover remaining fixtures with plastic sheeting for protection.
| Step | Action | Purpose |
|---|---|---|
| 1 | Clear Room | Remove furniture and accessories |
| 2 | Electrical Safety | Disconnect fixtures and power |
| 3 | Surface Protection | Install plastic sheeting and drop cloths |
| 4 | Ventilation Setup | Open windows and position fans |
Ensure proper dust containment by securing plastic sheeting to walls and floors using painter’s tape. Establish adequate ventilation by opening windows and positioning fans strategically. This thorough surface protection approach will safeguard your space while creating an efficient work environment for your popcorn ceiling removal project.
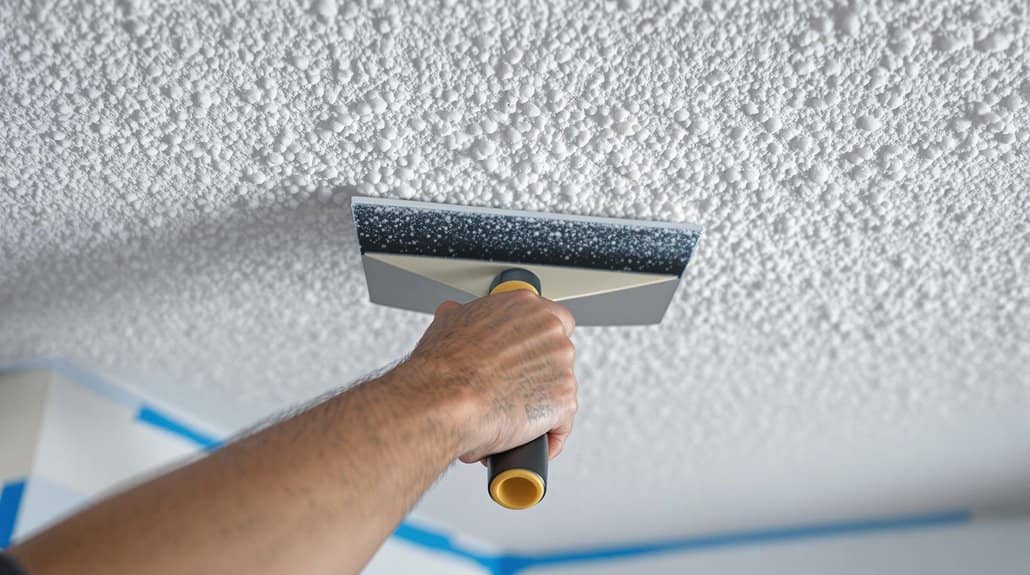
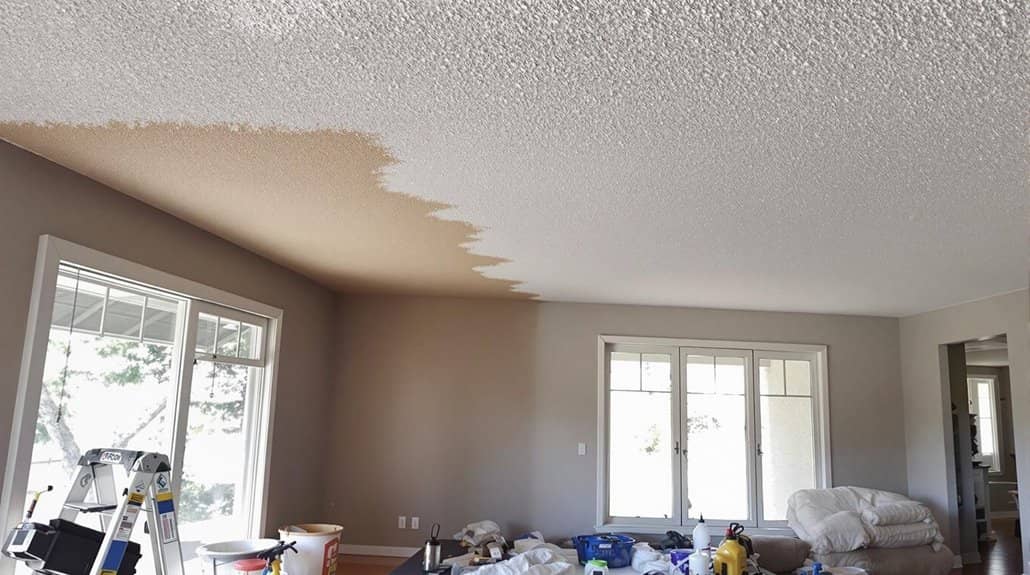
Professional Techniques for Effective Popcorn Texture Removal
Professional popcorn ceiling removal demands a systematic wet scraping approach to secure ideal results while minimizing dust dispersal. In Calgary’s residential market, you’ll want to follow proven techniques that guarantee effective removal while protecting your property and health.
- Apply a fine water mist to manageable 4-6 square foot sections using controlled spraying
- Utilize professional-grade ceiling scrapers with extended handles for precise removal
- Wear proper personal protective equipment including respirators and safety goggles
- Work methodically across the ceiling, maintaining consistent pressure to avoid drywall damage
After completing the wet scraping technique, you’ll need to inspect for imperfections. Address any damaged areas with joint compound, followed by careful sanding to achieve that smooth finish you’re looking for. This attention to detail secures your Calgary home’s ceiling meets professional standards.
Post-Removal Repairs and Surface Finishing
Once you’ve successfully removed the popcorn texture, proper surface preparation becomes your next focus. Examine your drywall for nicks and gouges, then apply joint compound to these areas for a smooth finish. You’ll need to sand the repaired sections after drying to create seamless shifts with the existing surface.
Before painting, you’ll want to apply a quality primer like Kilz Drywall across the entire ceiling. This vital step guarantees peak paint adhesion and creates a uniform base for your final coat. When tackling the surface finishing, use a roller for the main areas and a corner tool for precise edge work. Remember to allow 24-48 hours between coats for proper drying. These post-removal repairs might take extra time, but they’re necessary for achieving that professional, flawless ceiling you’re aiming for. Expect to pay around basic drywall installation costs of $500 for a small ceiling repair project in a single room.
Cost Analysis and Project Timeline Planning
When planning your popcorn ceiling removal project in Calgary, you’ll need to budget between $1-$3 per square foot, with most 500-square-foot projects ranging from $500-$1,500. For larger spaces exceeding 1,000 square feet, expect costs upward of $3,000, particularly if asbestos testing is required.
The renovation process typically spans 1-2 weeks, including:
- Initial assessment and asbestos testing (if your home predates late 1970s)
- Surface preparation and protective covering installation
- Removal and repair of damaged areas
- Final cleanup and surface finishing
You’ll want to factor both removal expenses and repair costs into your budget. Keep in mind that asbestos abatement can double or triple your project costs, while adding an extra week to your timeline for testing and results.
Frequently Asked Questions
How Much Does It Normally Cost to Remove a Popcorn Ceiling?
You’ll typically spend $1-$3 per square foot for popcorn ceiling removal, with 500 square feet costing $500-$1,500. If asbestos is present, expect costs to double, plus extra expenses for ceiling repair and painting.
What Do Professionals Use to Remove Popcorn Ceiling?
You’ll find professionals use wet scraping techniques, ceiling scrapers with extended handles, and garden sprayers while wearing safety gear. They’ll test for asbestos initially, protect spaces with plastic sheeting, and finish with drywall repairs.
Who Takes Down Popcorn Ceilings?
You can hire professional contractors who specialize in popcorn ceiling removal, or tackle it yourself using DIY techniques. However, you’ll need asbestos testing initially, proper safety gear, and tools for efficient removal and cleanup.
How Do I Prepare My House for Popcorn Ceiling Removal?
Clear your room completely, cover floors and walls with plastic sheeting, turn off electricity, protect light fixtures, and guarantee proper ventilation. You’ll want to seal doorways and create a clean workspace before starting removal.
Conclusion
Removing popcorn ceilings in Calgary demands careful planning, proper safety protocols, and attention to detail. You’ll need to factor in asbestos testing costs, specialized tools, and surface preparation materials. Whether you’re tackling this as a DIY project or hiring professionals, expect the process to take 2-4 days per room. Remember to obtain necessary permits and follow local disposal regulations for waste materials.